


Because of a current limitation in Open edX, when an LTI Consumer is created, a new Client ID is created. This limits you, out of the box, to only one LTI 1.3 link per course. (You could create multiple Lazuli configurations, but it is terribly cumbersome). For a single resource link out in a course, this works fine. LTI 1.1 does not have this limitation, but is a legacy integration method and is not recommended. (See also setting up an reusable configuration that supports multiple LTI 1.3 components)
Creating a single LTI 1.3 resource launch link
If you want to enable a single LTI link to the Lazuli player that tracks student usage and doesn't require iframes, you can create a single LTI 1.3 consumer component in any page of your LMS that links out to Lazuli's course player.
Step 1: Setting up your LTI Consumer component
Note: In some versions of Open edX, this requires enabling "LTI_consumer" in your advanced components in your admin configuration. In recent versions of Open edX, this is set already.
In your Open edX unit, select Advanced components
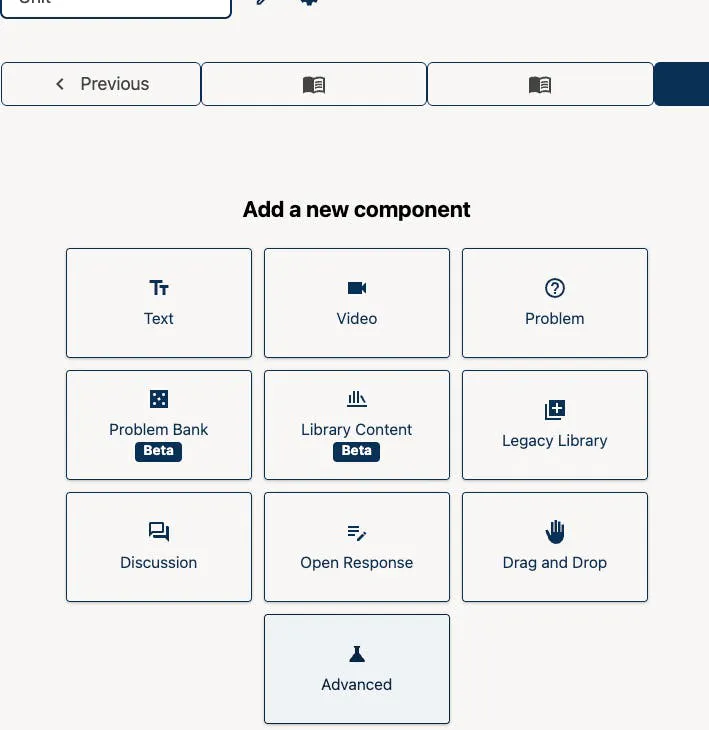
and select LTI Consumer and then select the Edit (pencil) icon.
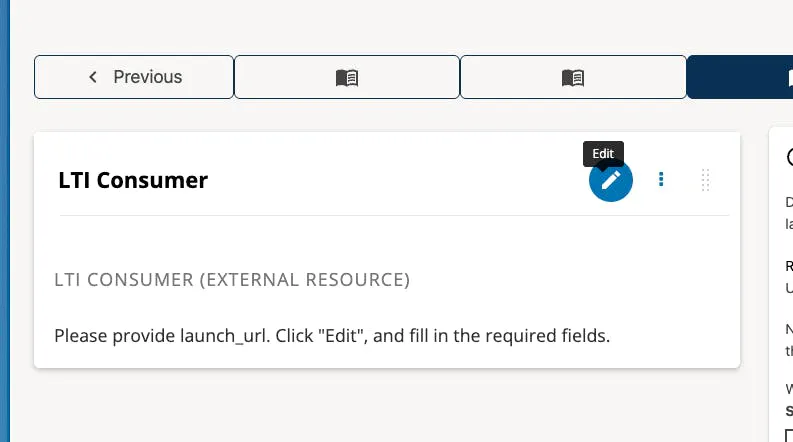
You'll get many of the configuration details from Lazuli on you Lazuli LTI configurations page (https://lazuli.design/orgs/{your-org-id}/settings/lti).
Enter the following details:
Display Name: Give the component a name. The default is "LTI Consumer" and you can't remove the "(External Resource)" section.
LTI Application Information: feel free to put something descriptive about Lazuli for students like "Lazuli interactive learning tool".
Configuration Type: Use Configuration on block.
LTI Version: Use LTI 1.3
LTI Launch URL: Use the "Tool URL (Launch URL)" or https://lazuli.design/api/lti1p3/jwks
Registered Redirect URIs: Create a JSON array with all urls listed. At the minimum, use ["https://lazuli.design/api/lti1p3/jwks"]
Tool Initiate Login: Use the "Login URL (Initiate Login): or https://lazuli.design/api/lti1p3/login?orgId={replace with your orgId}.
Tool Public Key Mode: Keyset URL
Tool Keyset URL: use the "Public Key (JWKS) URL or https://lazuli.design/api/lti1p3/jwks
LTI Launch Target: New Window
Button Text: give it a descriptive name like "Launch Course Content"
You'll now see the information you need to include in lazuli to configure your LTI connection
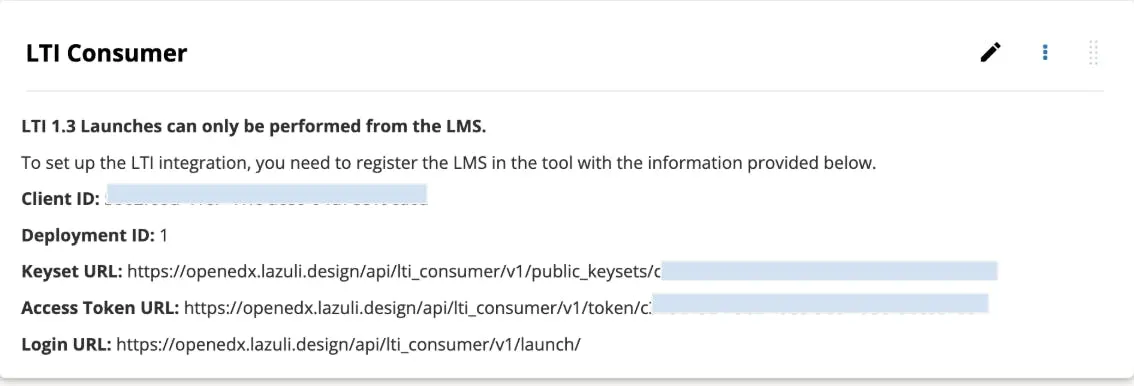
Step 2: Adding your LTI Configuration to Lazuli
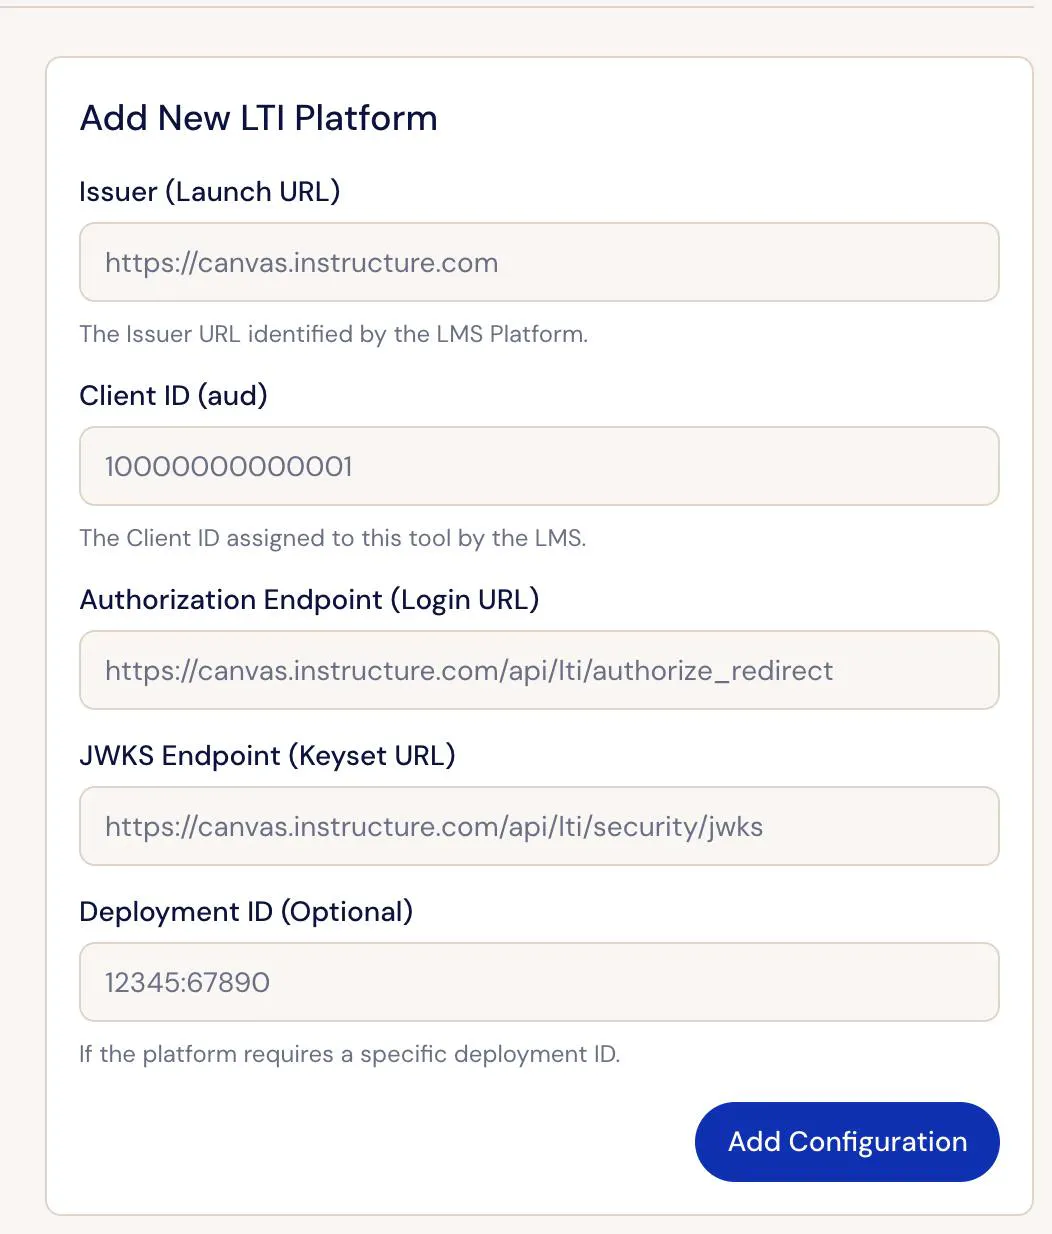
You’ll need to return to your LTI configuration in Lazuli’s admin panel (https://lazuli.design/orgs/{your-org-id}/settings/lti) and Add New LTI Platform. This is the step where you tell Lazuli how to connect to Canvas.
Issuer (Launch URL): Use your Open edX url (e.g. for us it's https://openedx.lazulidesign)
Client ID (aud): Use the Client ID from the LTI consumer block (from above)
Authorization Endpoint (Login URL): use the Login URL from above
JWKS Endpoint (Keyset URL): use the Keyset URL from above
Deployment ID: use the deployment ID from above
(you do not need to use the Access Token URL)
When you return to Open edX, you should be able to preview the course and see the resource launch link.
Note: in older versions of Open edX, you have to publish your changes before they will work.
Creating a Single LTI 1.3 iframe with deep linking
Sometimes you may only want to include a single Lazuli iframe from your course as an LTI consumer. This is made even easier with deep linking. The steps are the same above, but you add the following details in the LTI consumer settings:
Deep Linking: set to "True"
Deep Linking: use the lazuli deep link URL (which is the same as the Tool URL (launch URL). You can use https://lazuli.design/api/lti1p3/launch
You should now see the deep linking launch option on the LTI Consumer component. After you have added your LTI configuration to Lazuli, you should be able to select a single resource to add to your Open edX Unit.
Note: While Lazuli allows you to select more than one page, Open edX will error if you do. Only select a single resource from the deep link selector.

Configuring LTI 1.1 components (Legacy)
If you need to create multiple individual LTI iframes in Open edX components, and do not have access to the reusable configuration plugin, you can still use LTI 1.1 for this. This is a deprecated standard and uses a less secure authentication method, so it is not recommended.
Step 1: Getting your LTI 1.1 details from Lazuli
When publishing a course in Lazuli, you have the option
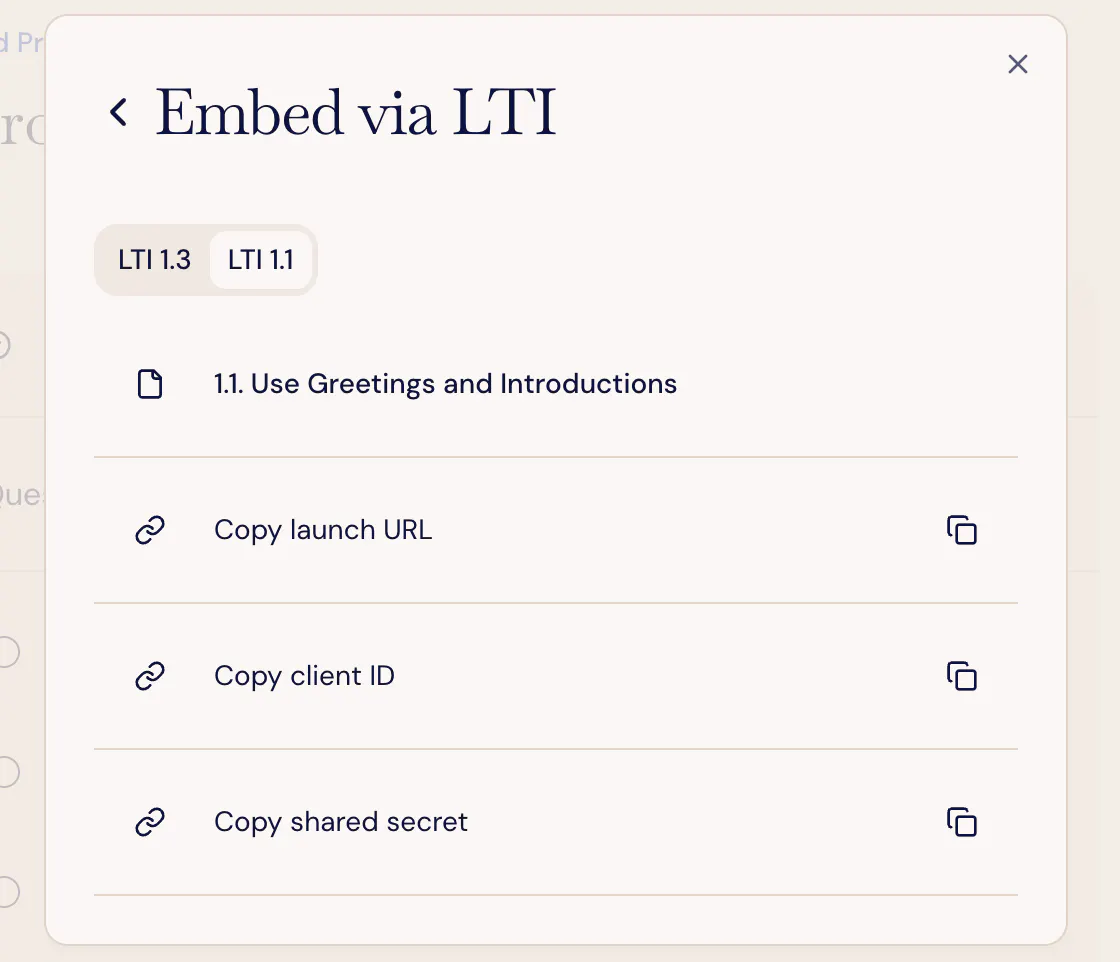
Keep this handy in another window or copy all the values where you can access them for Step 2 and 3.
Step 2: Create an LTI passport in your advanced settings
Back in Open edX studio, you'll need to create an LTI passport. Go to Settings and Advanced Settings.
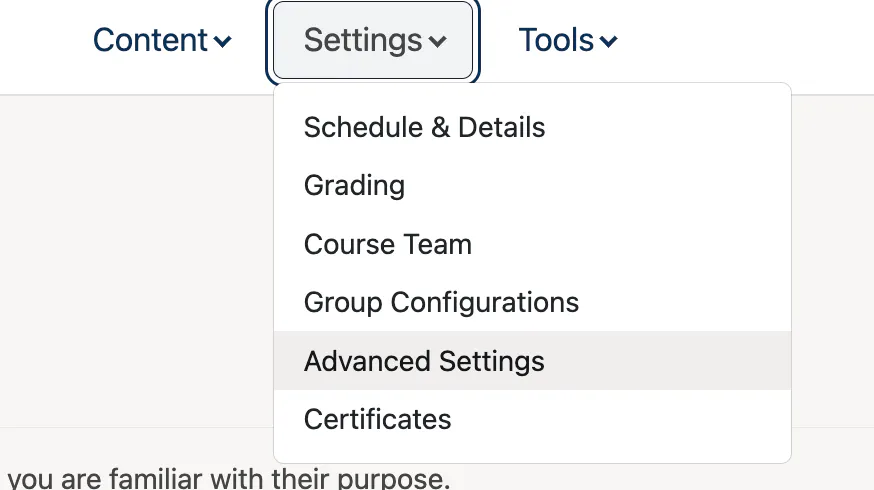
Then look for LTI Passport and create an LTI ID (e.g. "Lazul" and enter your client key and your Client Secret from step 1 above. Write it as a JSON array of passports, with parts separated by colons in the following format:
{your_lti_id}:{client_key}:{client_secret}

Step 3: Configure the LTI Consumer Component
Back in your Studio Unit, add your LTI Consumer component as above. In addition to any settings above, Include the following fields:
LTI Version: "LTI 1.1/ 1.2 (Default)"
LTI ID: this is the first part of the LTI passport from step 2, or in this case "lazuli". (Note: case and spacing matters)
LTI URL: Use the Launch URL your copied from Lazuli in step 1.
You may want to set the line height to something that works best for the iframe. When you preview the course, you should now see your LTI iframe.