


To add LTI content to your Canvas course, you need to first create an LTI app. There are a couple ways to do this, depending on how your LMS is set up (e.g., a single account or sub accounts).
Step 1. Registering your App
There are currently three ways to register your app.
Dynamic Registration
Recent updates to LTI make sharing configuration settings with Canvas a breeze.
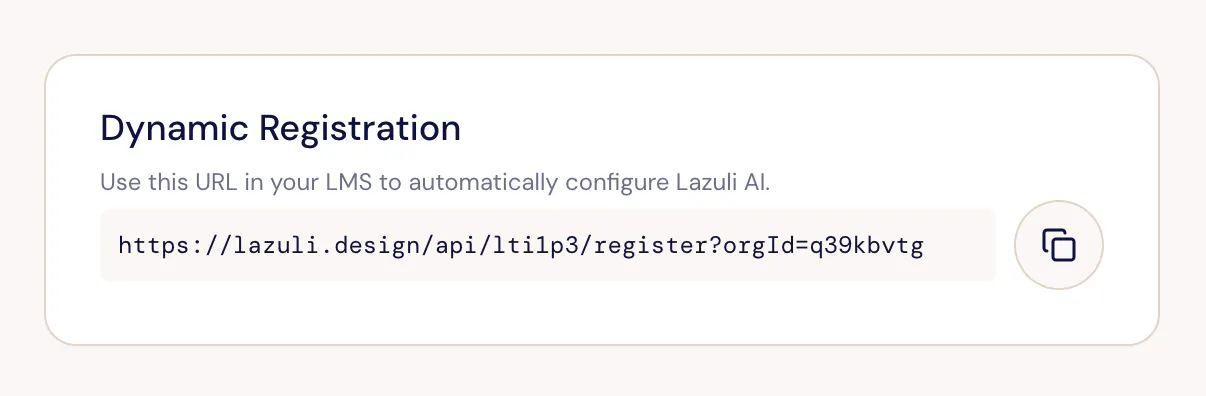
Getting your dynamic registration URL
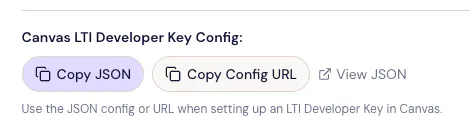
In your LTI settings, you will see the dynamic registration url. You can copy the URL by selecting the copy icon.
Generate a developer key in Canvas.
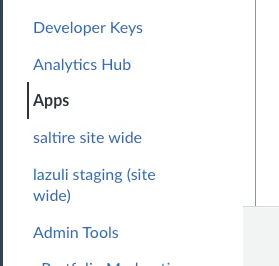
In the Admin section (at the site level if you have sub accounts) select Developer Keys
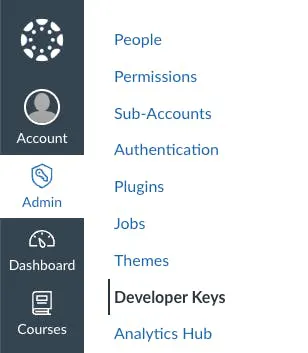
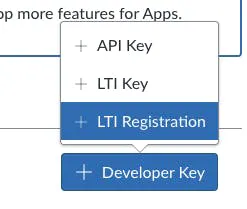
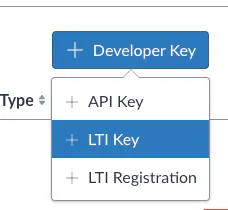
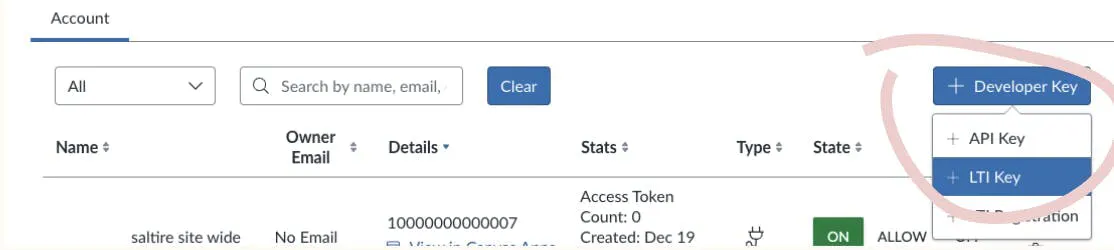
And select the “+ Developer Key” button and the “+ LTI Registration” dropdown.
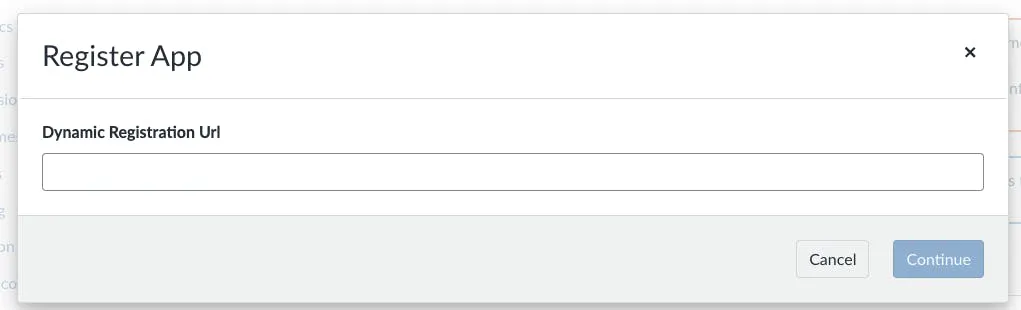
From there you can enter the developer key you got from Lazuli
After the dynamic registration process has completed, you should see a notification toast telling you the registration was successful. You will be sent to the Lazuli LTI configuration screen where you can confirm the registration was successful. You can then close the modal (it may only give you the option to cancel or go back. Just close the window with the x in the top right).
Refresh your Canvas page, and you should then see the updated Developer Key in Canvas. You will still need to enable it by toggling the "on" option.

Note: you are unable to change most of the settings of the keys or apps generated by dynamic registration.
Registration with a JSON URL or File
Follow the same steps as above, but under "+ Developer Key", select "+ LTI key".
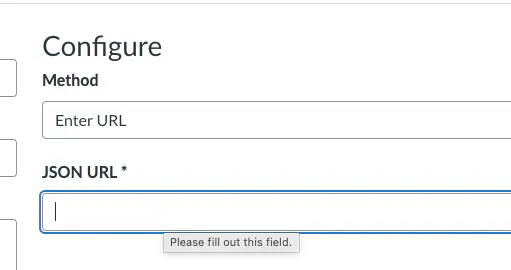
Change the Method to "Enter URL"
Retrieve the Config URL from the LTI settings in Lazuli
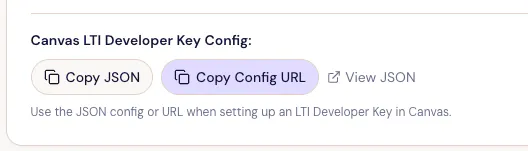
Simply paste the URL and optionally give the configuration a name, and then hit "SAVE" in the bottom right of the screen.
Or, if you want to fine tune the JSON settings,
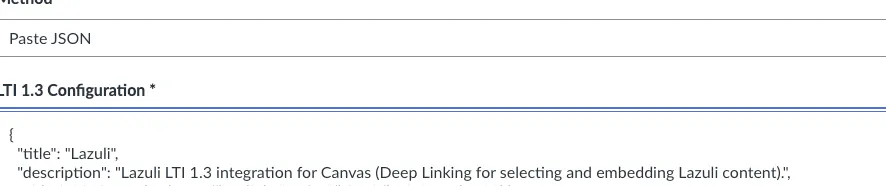
Change the Method to "Paste JSON"
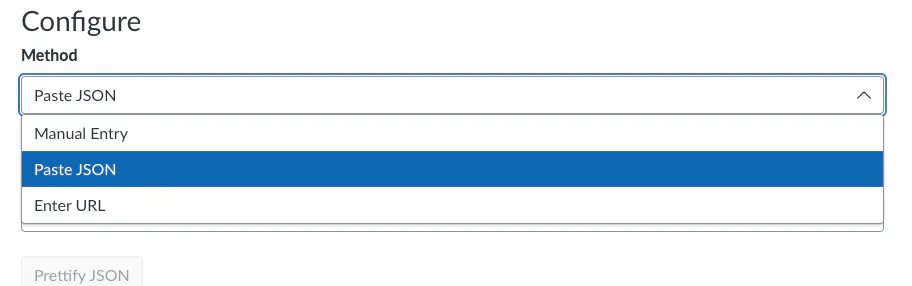
Copy JSON object from Lazuli's LTI configuration page (or View the JSON)
paste it in the json field (replacing the {} brackets). You can edit any of the settings if you need to customize the configuration. The redirect URLs field will automatically populate. Optionally, give the configuration a name. Then click "Save" in the bottom right of the screen.
Manual Registration
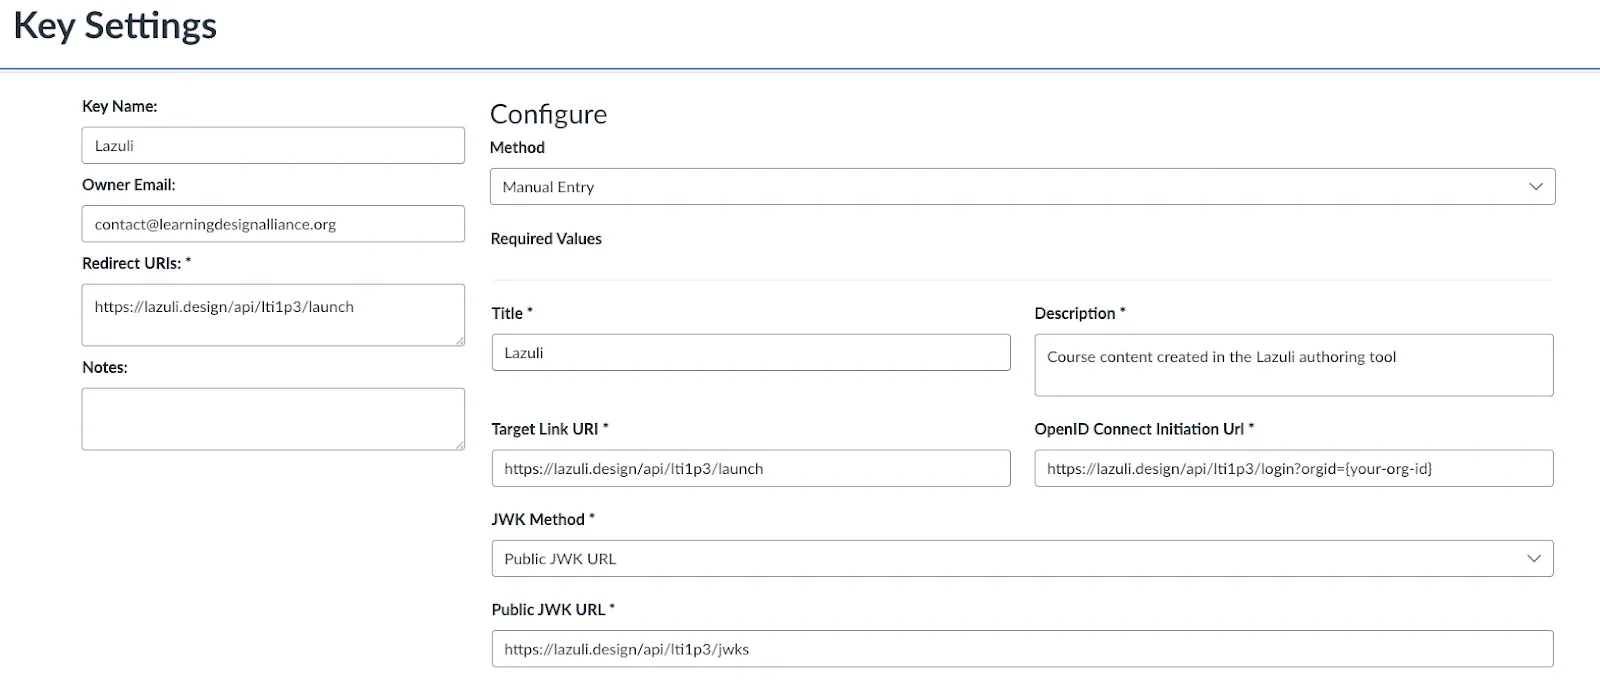
In the Developer Keys section of the admin settings, select “+ Developer Key” button and the “+ LTI Key” dropdown.
Enter the following fields:
Title: give your key a memorable name, like "Lazuli"
Description: give your key a short description like "Lazuli Content Authoring Tool from Learning Design Alliance"
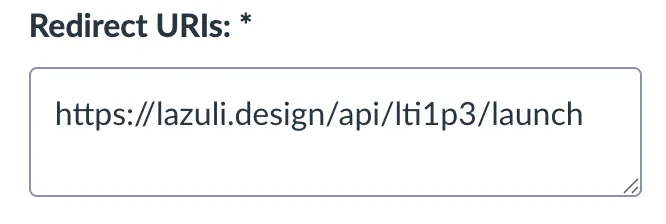
Target Link URI: this is the "Tool URL (Launch URL)" from Lazuli. It should be https://lazuli.design/api/lti1p3/launch
Redirect URIs: list all target URLs as separate lines (no quotes needed). Each launch resource URL you use will need to be listed or you'll get an error. At a bare minimum, list the Target Link URI
OpenID Connect Initiation Url: use the “Login URL (Initiate Login)”, or https://lazuli.design/api/lti1p3/login?orgId={replace with your orgId}
JWK Method: select "Public JWK URL"
Public JWK URL: use the "Public Key (JWKS) Url" or https://lazuli.design/api/lti1p3/jwks
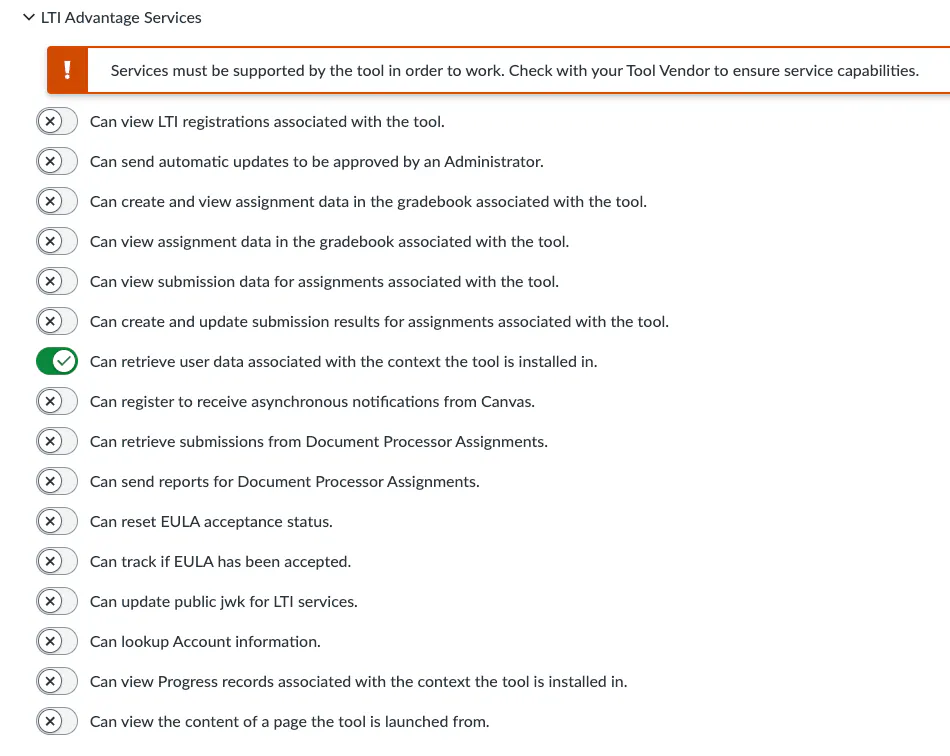
For now the only LTI Advantage Services needed is Can Retrieve User Data Associated with the Context the tool is installed in. This allows us to collect basic user credentials (Canvas ID, email, name) for tracking and communicating student progress in Lazuli.
(optional) Icon Url: you can use https://storage.googleapis.com/storage-prod-lazuli-public/[email protected]
Privacy Level: set to Public to allow us to collect basic student information. For more about LTI privacy in canvas, see https://community.instructure.com/en/kb/articles/637141-privacy-implications-of-installing-an-lti-1-3-tool-in-canvas
Placements:
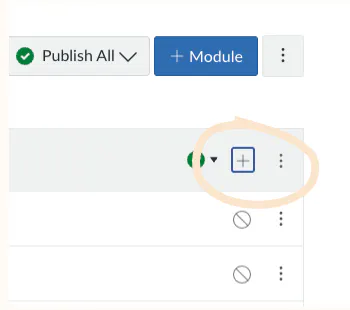
Link Selection- This allows you to use the deep link selector to choose individual pages to be included as iframes or a link to an external page load (which is better for complex interactions). Select the Plus button in the Modules section of the course.
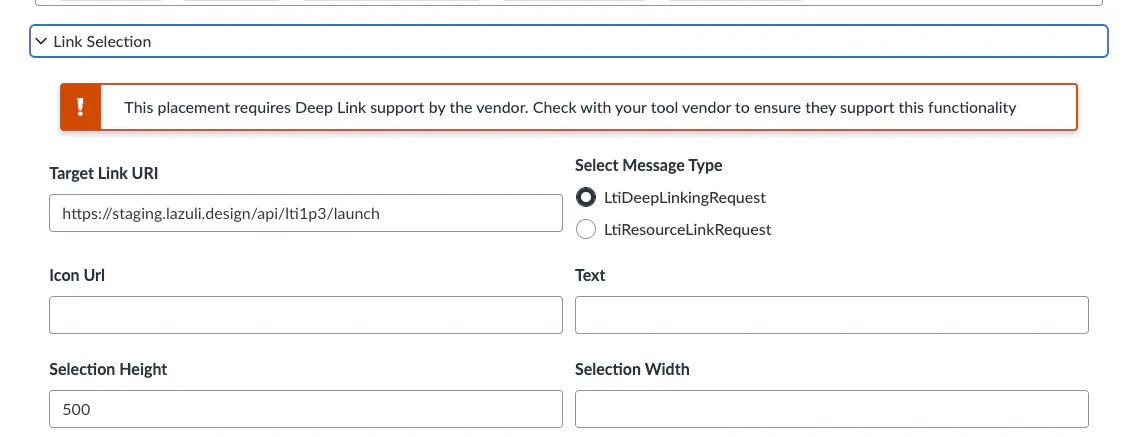
Set up the following Link Selection settings (you may have to save and then reopen the page to see the menus for each placement)
Target Link URI use the Deep Linking URL from Lazuli.
Select LtiDeepLinkingRequest in the Select Message Type.
You can also set the Selection Height to 500 to provide a large enough deep link page selector screen that works on laptops and other small screens (if you don’t select a selection height, the deep link modal will be small, but you can resize it).
Account navigation- This is a required placement for manual LTI configuration in Canvas. This places a link to the Lazuli tool in the Apps section of the Admin page. Note, we do not use this placement in automatic registrations.
Additional placements may be made available in the future.
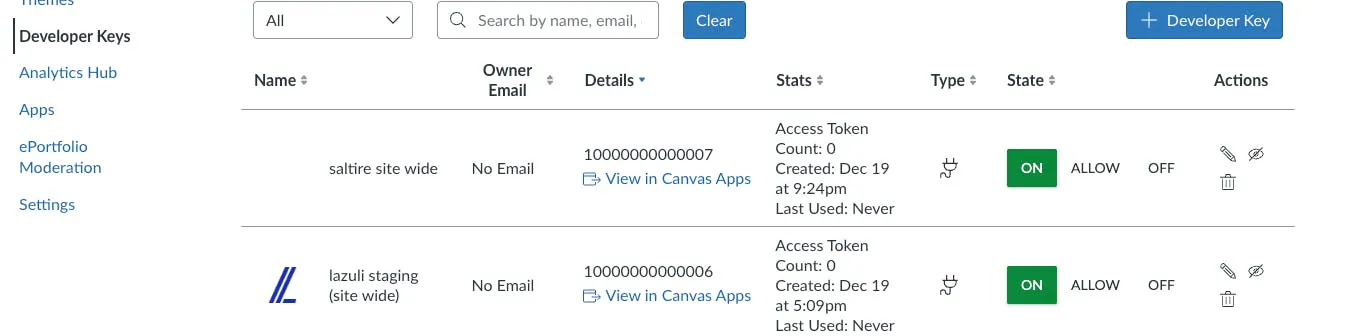
Step 2: Enabling the developer key.
After the developer key is saved, you will see it in the Developer Keys section of the Admin page. You can activate the key by selecting On.
You (or any sub accounts) are ready to add the app to their deployment. You will need the Client ID listed under the Details column.
Step 3: Activating your app
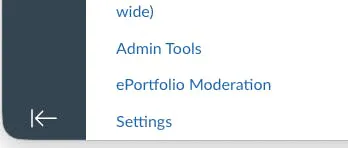
While canvas has an Apps section of the Admin page, we’ve found it’s not always best to configure sub account’s deployments with this tool, though that may change with future product updates. For now the best way to deploy an app is in the Settings at the bottom of the Admin menu, and then selecting the Apps tab. From there select + App.
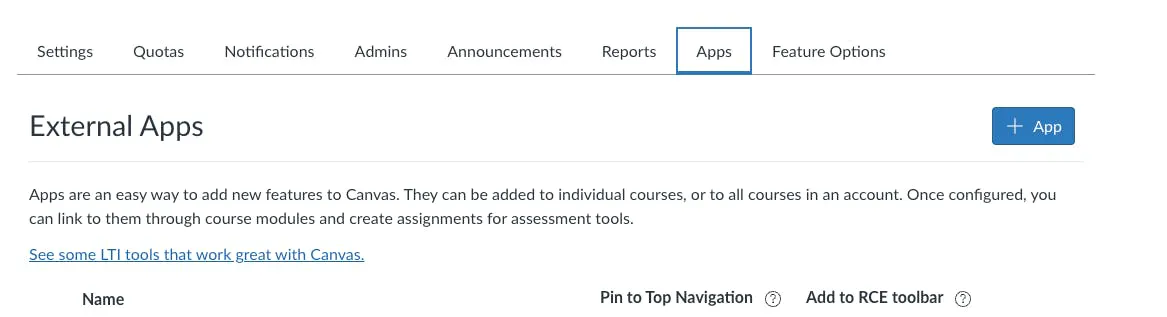
Change the Configuration Type to By Client ID, and enter the client id copied from Step 2.
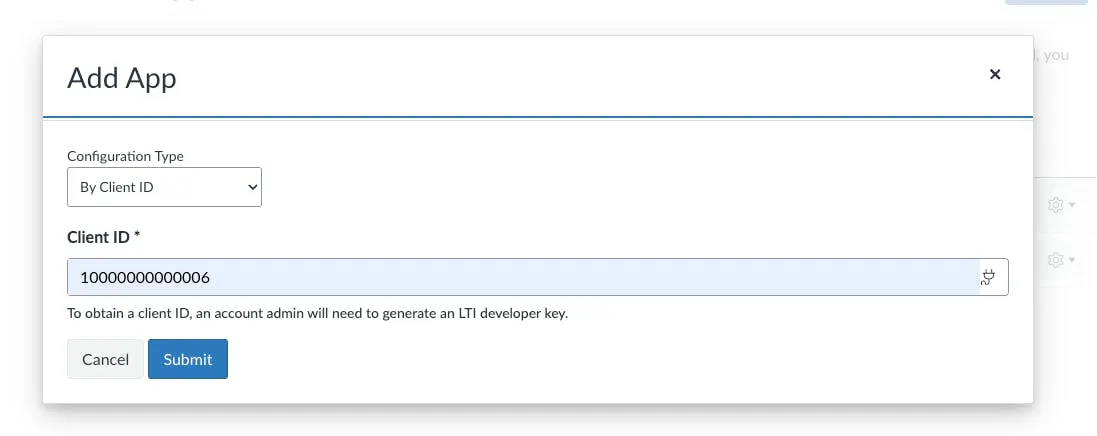
If you have configured the developer key correctly it will ask you if you want to add this to your deployment.
This is especially useful if your organization has set up multiple deployments, such as for each department, school, or location within an institution. The LMS admin only has to configure Lazuli one time, and each group within the organization can fine tune their deployments using this step.
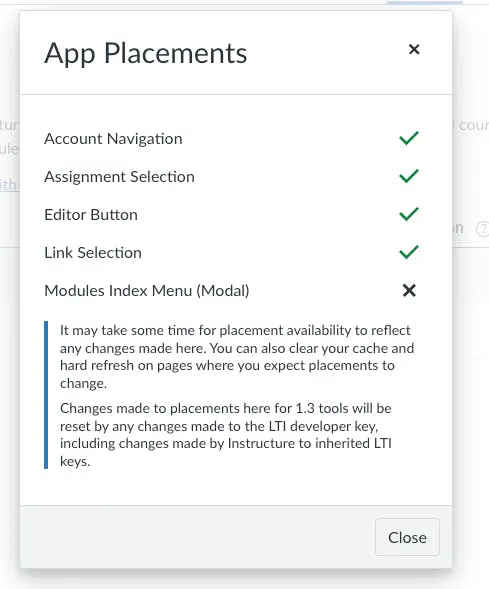
Once it’s been added you can confirm the placements are as expected and even disable any placements for that deployment.
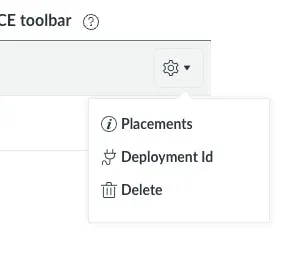
You will need to select the settings cog and open the Deployment Id modal.
This will give you the deployment ID you’ll need to configure the tool in Lazuli (step 4), unless you used dynamic registration, where registration in Lazuli is done automatically.
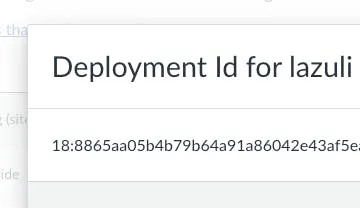
Option 2: Registering and Activating your app with a Single Account
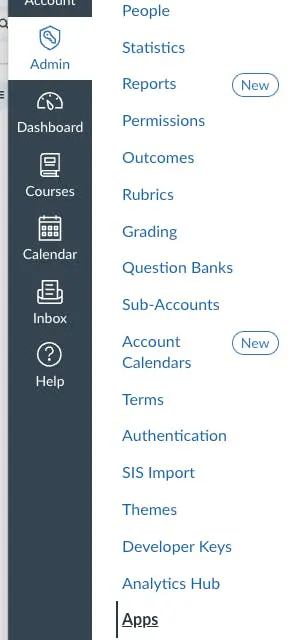
If your organization has a single deployment, you can combine LTI registration and activation into one step. In the Apps section of the Admin section, you can select Install a New App.
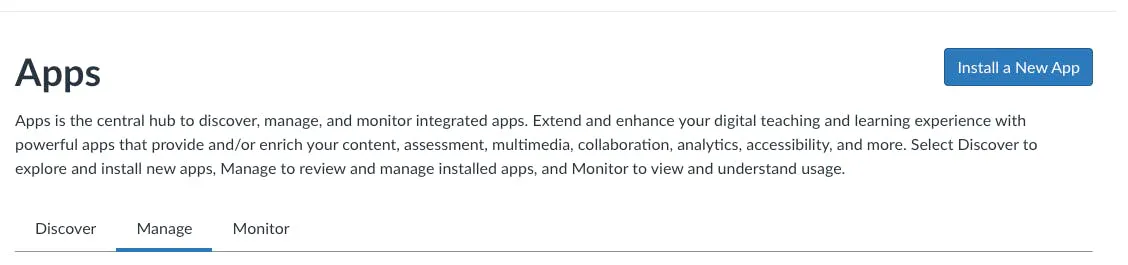
From there select Manual (or follow the steps below for other methods) and give the app a name (Lazuli). From there, you can enter the Redirect URIs, Default Target Link URI, OpenID Connect Initiation URL, Select Public JWK URL and enter the JWK Url, Then select Next.
Then set the Permissions for the App (Can retrieve user data associated with the context the tool is installed in), and select Next, then select “All user data” to enable Lazuli to track students progressing in Lazuli activities. This is a more fine grained version of making the developer tool Public in step 1 above.
Then select the placements (Assignment Selection, Link Selection) and select Next and then define the LtiDeepLinkingRequest for each and supply the Deep Linking Url from Lazuli’s LTI Configuration (https://lazuli.design/api/lti1p3/launch) and select Next. Optionally you can give the app an Administrative Nickname, a Description and fine tune the placement names, and select Next and select Next.
Finally Review or edit any of the settings and click Install App.
Step 4: Configure the LTI Platform in Lazuli
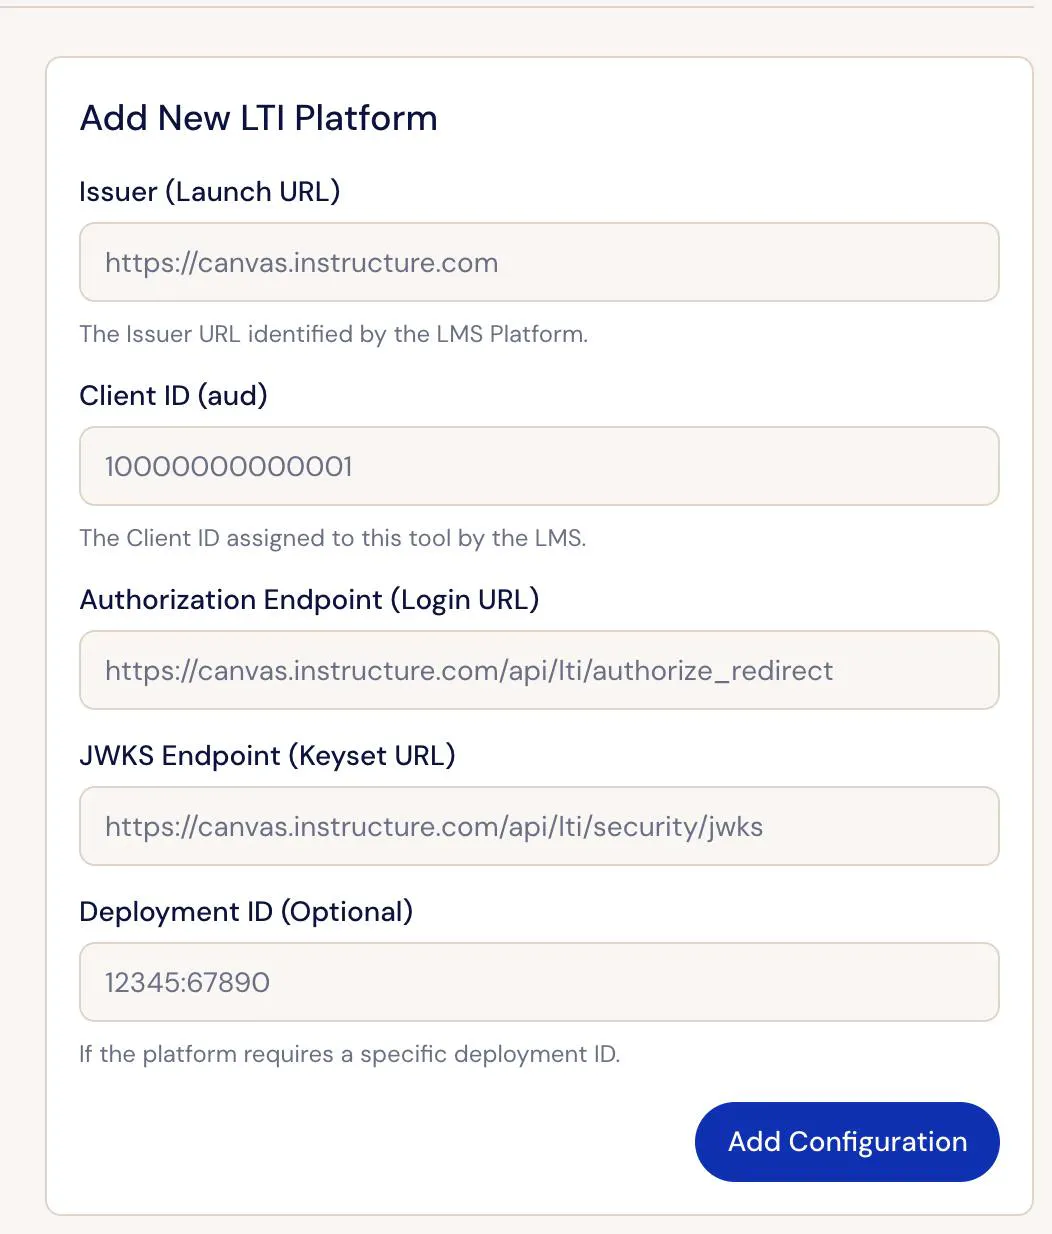
You’ll need to return to your LTI configuration in Lazuli’s admin panel (https://lazuli.design/orgs/{your-org-id}/settings/lti) and Add New LTI Platform. This is the step where you tell Lazuli how to connect to Canvas.
Issuer (Launch URL): this is your canvas domain (if it’s Canvas hosted, you can use https://canvas.instructure.com. Note if you self host, this needs to match exactly with your
lti_issvalue listed in theconfig/security.yaml.Specifically it should be the same protocol (http vs https), and not have any trailing slashes (/), periods or spaces.client ID (aud): This is the same Client ID you got at the end of step 2.
Authorization Endpoint (Login URL): Use https://canvas.instructure.com/api/lti/authorize_redirect.
JWKS Endpoint (Keyset URL): Use https://canvas.instructure.com/api/lti/secruity/jwks.
Deployment ID: This is the same deployment ID you got at the end of Step 3.
For more information about canvas’ key settings (including endpoints for dev and test environments), see https://developerdocs.instructure.com/services/canvas/external-tools/lti/file.lti_dev_key_config